Pong Version 2 and vgalib for ChipKIT
Last updated: 27 May 2012 - 12:19
I've finally got around to making the VGA driver into a library that doesn't require all that messy interrupt code in the main sketch. The actual operation is along the lines of the pixel based display used in the life games but I've re-implemented Pong with this new library as a test.
The schematic for the pong demo is the same as the original. The main code is much simplified by the interface that the library gives. I've added a count down to the start and a game over screen which has a QR code that links here. The example shows off all the methods currently available in the library.
The source code is in the examples folder of the VGA library along with some python scripts that were used to generate the bitmaps for the blit operations that generate the final game screen.
All the source and library are maintained on GitHub vgalib.
Graphical LCD Breakout Board
Last updated: 28 Apr 2012 - 18:35
Working Display: Display showing the OSHW logo as a demo.
I've got an on-going project to build a battery powered device. I want to be able to run the whole thing at 3.3V so I can easily and efficiently run it off a single LiPo cell. I also want to use a simple monochrome, graphical LCD for this project, but I couldn't find one that would run off 3.3V. For various other reasons, the project requires that the LCD is a classic 8bit parallel module as I had run out of hardware serial ports and bit-banged was making the refresh seem really slow. I found a few that would run the control lines off 3.3V but still needed some higher voltage to power the screen or back-light. Eventually I bit the bullet and decided to go with one of these from Farnell because it was the cheapest back-lit 128 by 64 pixel display I could get from them. It is a really good choice as it even includes electronic contrast control, something I was expecting to have to do in external circuitry. However, it isn't a nice 0.1" pitch module, it comes out to a 0.5mm pitch FPC connection.
BigTrak jr browser based LOGO programming
Last updated: 29 Jan 2012 - 16:53
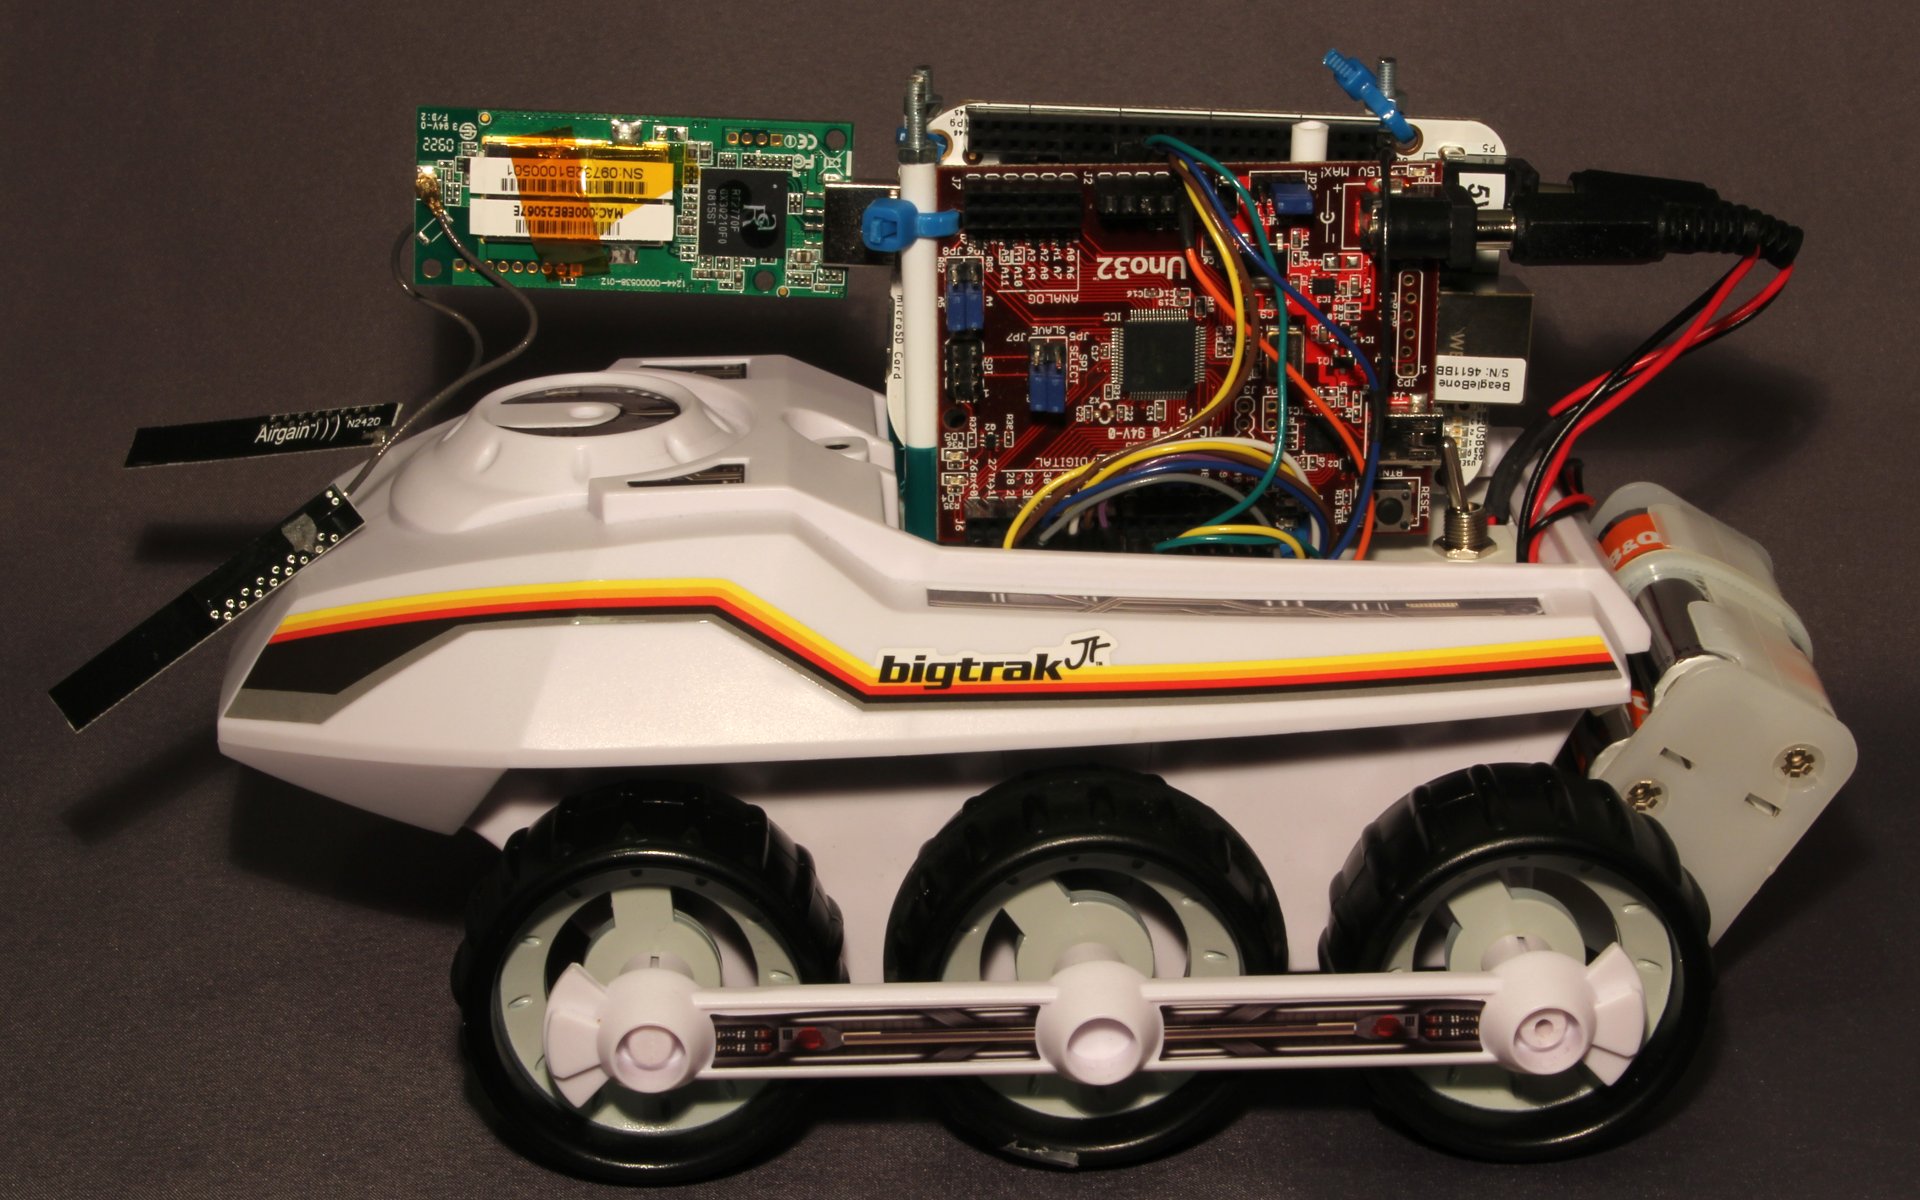
The Bigtrak Junior is a re-make of a classic toy apparently. I'd never seen one before, I remember school having a couple of floor turtles but I don't think I ever got to play with them (probably because I'd been messing around too much and not doing my work!). Basically the toy is a little programmable toy car that takes simple commands from a keypad with forward, back, turn left, turn right, pause etc. This is all very well but with only one memory location for storing your program between use and no editor only a "clear and start again" it's not much fun trying to get it to do things. Wouldn't it be better if it could be programmed from a web browser and you could actually use some sort of save/load program option to store your ingenious route design? The solution I've come up with could be argued to be over-engineered some what and quite expensive but I like to look at it as "expandable".
Opto encoded motors with the ChipKit Uno
Last updated: 28 Jan 2012 - 17:14
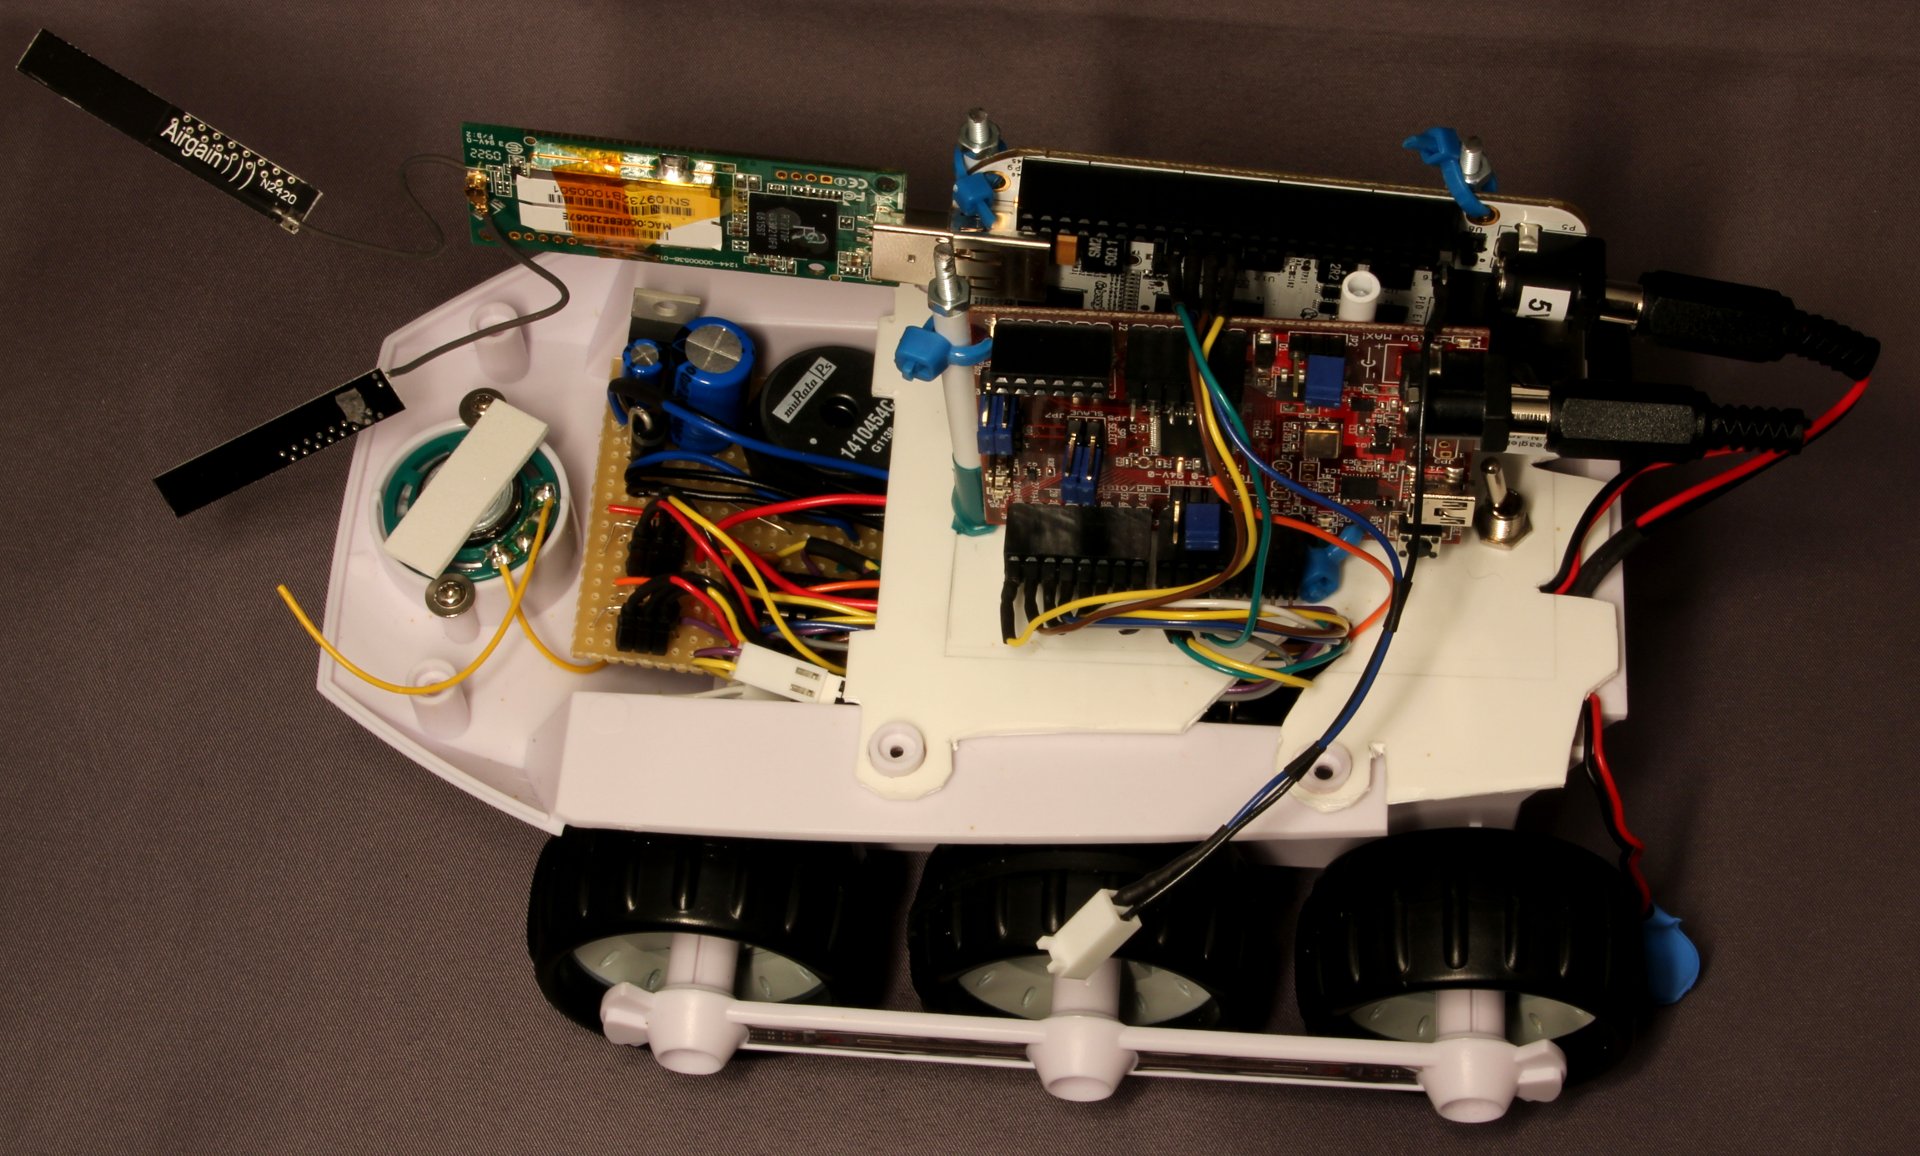
Having replaced the electronics in a BigTrak junior, I needed some way to control it from my BeagleBone. Initial experiments with driving the L293D directly from GPIO pins were quite successful but I quickly discovered the opto-encoders on the toy were extremely high resolution and needed some proper real-time interrupt based handling. Doing this from the high-level Linux based environment on the BeagleBone just sounded too much trouble to me so I looked around for something a bit lower level to handle the opto-encoder tick counting. I was torn between an Arduino Uno and the ChipKit Uno. In the end I went for the ChipKit for two reasons, the BeagleBone I/O is only 3.3V and not 5V tolerant at all. This would have meant level translators were required on any interface between the Arduino and BeagleBone, but the ChipKit is already 3.3V. The other reason was at full speed the motor encoder ticks come through about 1200 times a second, with two that means about 2500 interrupts a second. I've got no idea how big the interrupt overhead is for the Arduino but I thought if I handle 16 or 32 bit tick counters in the interrupt with that frequency it is going to get a bit close to the limits of available CPU cycles, the ChipKit is 32bit and has an 80MHz clock so plenty of time to do all I needed. The features I've used are all available on the Arduino, due to some pin function constraints you'll need to swap around the pin order a bit but the code should work okay on an Uno (provided it can keep up).
ChipKIT: Conway's Game of Life on VGA, now with more colours
Last updated: 04 Nov 2011 - 20:46

Life With More Colours: The classic Conway's Game of Life with different colour pixels indicating time since birth/death.
If you haven't already, check out my ChipKIT implementation of Conway's Game of Life because I'm not explaining all that again! In this version there are some subtle changes to it that make it more pretty to watch, although arguably more confusing to see what's going on.
ChipKIT: Conway's Game of Life on VGA
Last updated: 03 Nov 2011 - 22:08

Life: Classic version of Conway's Game of Life using a chipKIT UNO32.
After the success of the ChipKIT pong demo I started to think about the ways to improve the graphics output and came up with the idea of a coarse pixel display. This is a more traditional pixel based display where a rigid grid is displayed on the screen rather than the more vector based display that I had used previously. This demands more of the CPU time because it has to copy the pixels to the display manually as there is no DMA on the UNO32, rather than only having to display the colour for a tiny fraction of each display line like the pong game did.
OggCamp 11: Open Source Hardware - Beyond the Arduino
Last updated: 23 Jul 2011 - 21:34
I'm going to be at OggCamp again this year. I'm planning a talk for the barcamp on open source hardware, particularly hardware more powerful or less well known than the Arduino. The ChipKIT will feature in the talk and hopefully the Pong game will be there for you to play. I'm also going to be bringing a ChipKIT MAX32 for the raffle courtesy of Farnell, so for your chance to win this awesome board, you need to come along.
Pong on a VGA monitor with the ChipKIT Uno32
Last updated: 15 Jul 2011 - 19:59
Following on from my review of the new ChipKIT Uno32 from Farnell, I've done a little project to test out what it's capable of. I had never programmed for an Arduino before and I've learned a lot about the way the system works from this project. One of the early revelations which amazed me was that the Arduino "Wiring" language is in fact not a language at all but simply a couple of header files that wrap up some boiler plate C++ code. I can see the reason that it was marketed as an "easy to use language" and the mention of C++ was avoided initially as it made the platform more attractive to artists and hobbyists not interested in learning a big scary "real" programming language. The fact that you can just use any old PIC (or on the original AVR) compatibile C code makes it a lot more attractive for those wanting to dig a bit deeper.
ChipKit Uno32 Review
Last updated: 13 Jun 2011 - 18:37
Disclosure: The ChipKit Uno32 for this review was supplied free of charge by Farnell.

Boxed chipKIT Uno32: The minimal packaging has become popular for Arduino and similar platforms.
Product name: ChipKit Uno32
Price: £17.99 ($26.95)
Supplier: Farnell
Category: Microcontroller development board
The ChipKit Uno32 is a new Arduino-compatible board from Digilent and Microchip, based around a PIC32 MIPS microcontroller. This makes it a vastly more powerful platform than the ATMEGA328 based Arduino Uno, a lot of the press releases about it seem to be claiming that it's the first 32 bit based Arduino compatible, whether or not you consider the Maple to be equally worthy of this title, it has to be said it's a huge leap for the power of the platform.