ChipKIT: Conway's Game of Life on VGA
Last updated: 03 Nov 2011 - 22:08
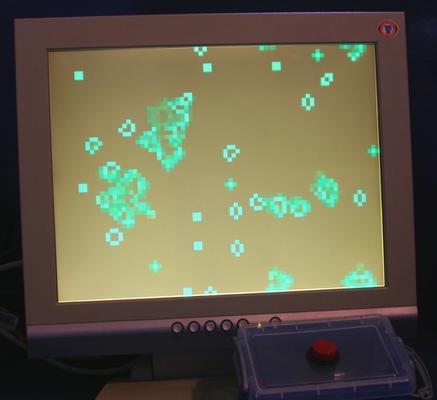
After the success of the ChipKIT pong demo I started to think about the ways to improve the graphics output and came up with the idea of a coarse pixel display. This is a more traditional pixel based display where a rigid grid is displayed on the screen rather than the more vector based display that I had used previously. This demands more of the CPU time because it has to copy the pixels to the display manually as there is no DMA on the UNO32, rather than only having to display the colour for a tiny fraction of each display line like the pong game did.
Pong on a VGA monitor with the ChipKIT Uno32
Last updated: 15 Jul 2011 - 19:59
Following on from my review of the new ChipKIT Uno32 from Farnell, I've done a little project to test out what it's capable of. I had never programmed for an Arduino before and I've learned a lot about the way the system works from this project. One of the early revelations which amazed me was that the Arduino "Wiring" language is in fact not a language at all but simply a couple of header files that wrap up some boiler plate C++ code. I can see the reason that it was marketed as an "easy to use language" and the mention of C++ was avoided initially as it made the platform more attractive to artists and hobbyists not interested in learning a big scary "real" programming language. The fact that you can just use any old PIC (or on the original AVR) compatibile C code makes it a lot more attractive for those wanting to dig a bit deeper.
ChipKit Uno32 Review
Last updated: 13 Jun 2011 - 18:37
Disclosure: The ChipKit Uno32 for this review was supplied free of charge by Farnell.
Product name: ChipKit Uno32
Price: £17.99 ($26.95)
Supplier: Farnell
Category: Microcontroller development board
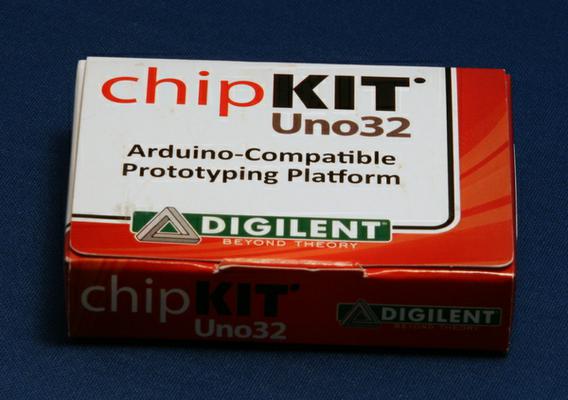
The ChipKit Uno32 is a new Arduino-compatible board from Digilent and Microchip, based around a PIC32 MIPS microcontroller. This makes it a vastly more powerful platform than the ATMEGA328 based Arduino Uno, a lot of the press releases about it seem to be claiming that it's the first 32 bit based Arduino compatible, whether or not you consider the Maple to be equally worthy of this title, it has to be said it's a huge leap for the power of the platform.
Server Monitor
Last updated: 31 Oct 2010 - 21:47
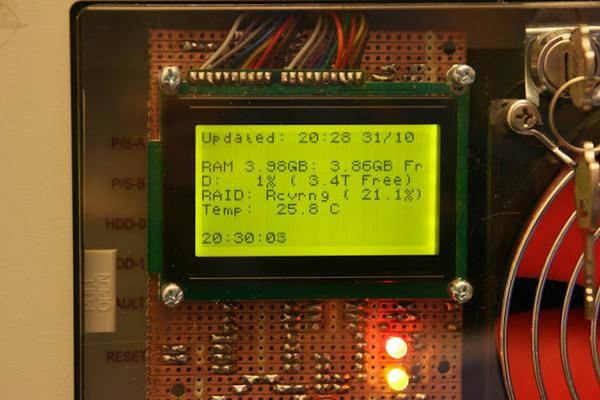
I've been in the process of upgrading my backup/home media server for a few weeks now. I managed to get hold of an old case from a skip outside a closing down fax/photocopier company. It's a fairly decent case, although it was somewhat 5.25" centric in design. Amongst other things I did to modify this case, I replaced the old drive door with a new completely transparent one with some USB ports and an additional fan for cooling the new compliment of many hard disks. The server is going to be running in a cupboard without a monitor most of the time and I wanted to be able to see at a glance what the system was doing. Inspired by the computer-graphic imaginary servers that are featured in web hosting ads that have a screen on the front, I set about adding a little monochrome LCD.
Z80 Project Mark 2: Flashing lights progress
Last updated: 20 Sep 2009 - 17:38
I have made some progress on the Z80 project. Another mod, some software and learned some new lessons about PIC programming on Linux.
Another Mod I realised the other day that my plan to start testing peripherals with the PIC before inserting the Z80 would not work. My design has bus buffering to ensure the mash up of TTL and CMOS components all get valid signals. However the decision about what chip is driving the bus is made based on the status of the BUSACK line from the Z80. This means that without the Z80 fitted, or with it held in RESET the two sets of bus drivers (one from the Z80 and one from the PIC) could be in conflict as their enable line states are undefined. To deal with this problem I've added a 10K pull down resistor under the Z80, this will make sure that if the Z80 isn't driving the pin (because it's not fitted or it's in reset) the PIC has control of the data bus.
Software The first bit of software I wrote was a trivial
Nathan's Z80 Project Mark 2: CPU Supervisor
Last updated: 24 Aug 2009 - 22:43
A large amount of the usual faff found in Z80 systems has been avoided in my design by including a PIC next to the Z80. This PIC replaces the reset timing circuit, the clock generation circuit for the Z80 and the need for ROM and associated decode logic to select the ROM chip. In addition it provides mass storage (via an SD card interface) and a useful in-circuit emulator for debugging.
All this is achieved by giving the PIC ultimate control over the Z80 by controlling the reset and clock lines, as well as the DMA control lines. The PIC can then control the system while the Z80 is in reset or DMA mode. Since PICs can turn their pins from input to output, several pins function both as input and output depending on what the PIC is doing (e.g. RD, WR, WAIT etc.) Others have been added specifically for debugging or booting (e.g. MREQ, IORQ, and address pins). To be able to drive the whole 16bit address bus the PIC uses a latch for the high 8bits. The lower 8 are driven directly b
Giving the Z80 a good boot
Last updated: 15 Aug 2009 - 15:31
Booting computers is an age old problem. It seems like an easy task to you, just press the button, but the software and hardware involved is often a bit of a hack. When you start a Z80 processor (ignoring reset hold times and clock stability for the moment) it will try to load an instruction from memory address 0, execute it then move on. So the traditional way Z80 micro computers (like the Sinclair ZX Spectrum and the Amstrad NC100, to name a couple I own) are built is with a ROM chip at the bottom of the address space with some kind of operating system on it, e.g. a BASIC interpreter. This is cheap and simple, but has some big problems for the hobbyist or developer.
MPASM - memtool firmware
Last updated: 06 Aug 2007 - 22:04
I wrote an article a while ago about making a tool for reading and writing parallel memory chips using a PIC and a USBMOD2 unit. I have finally got around to writing the code out in MPASM (the original was for the PICAXE BASIC programmed PIC.) The code is fairly simple but shows how a PIC can effectively be used in place of complex glue logic.
Contents
- Source memtool.asm file
- Compiled HEX file, memtool.hex
- GPLv3 License
Memory Tool
Last updated: 20 Apr 2007 - 16:45
Introduction In some ways a Z80 processors program storage is easier to get at than modern flash based micro-controllers. However, modern micro-controllers usually have suitable software available for modern computers.


