DIY hand-held games console
Last updated: 29 Jun 2022 - 22:40
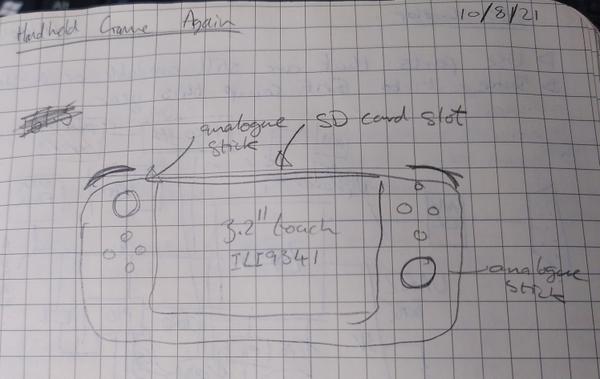
I've decided to have another crack at a hand-held games console project. I've had various ideas for doing this over the years. I built one based around a PIC18F4520 many years ago but didn't get far with trying to write the software for it. More recently (but still long ago) I had the idea that maybe the OggBox might make a simple console, if you hold it sideways the 4 buttons under one hand and the top two buttons in the other hand. Last year I got most of the way through designing one in my summer holiday, but the parts are all now out of stock and it was based on a PIC32 which I've now decided is a very bad idea having had to use them professionally since.
The chip supply crisis is still in full effect and I have almost no free time so this is going to be an interesting challenge, but I thought I'd document my process from the beginning this time and see where I get.
Stripboard Circuit Construction
Last updated: 21 May 2014 - 21:59
Before cheap prototype PCB services like OSHPark, Ragworm and iTeadStudio options for building circuits for prototype or hobby projects were much more limited. You could etch your own board, carve a board out of copper clad with an abrasive tool, wire-wrap it all or use stripboard.
Stripboard, sometimes known as Vero-board (after a popular manufacturer) is a kind of circuit board, usually a cheap substrate like SRBP, with long strips of copper about 2mm wide running the length of the board. Holes are typically punched on a 0.1" (2.54mm) grid across the board, making it easy to fit traditional through-hole components.
The basic technique of construction is to use a small drill type tool, known as a spot-face cutter, to cut the long traces to make separate parts of the circuit. Wires are run, perpendicular to the copper tracks to create links in the opposite direction, allowing complex circuits to be built up.
Tools: Mini Reamer
Last updated: 10 May 2014 - 12:50
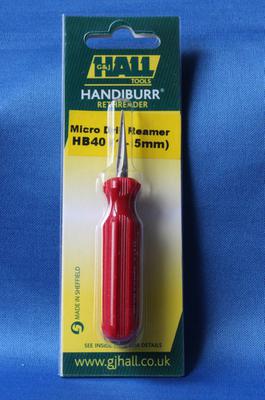
Stripboard construction and home-made PCBs are going out of fashion these days, but for the odd power supply or prototype they're still often worth doing. One of the most annoying problems I regularly face when building things (especially power supplies) on stripboard is components with leads too big to fit. Most cheap stripboard tends to use punched holes between 0.8 and 1.0mm in diameter (about 40 thou). With power-handling components particularly leads can be 1.0mm or even bigger, and they just won't push through the board. Opening out holes with a craft knife can be tricky, and having a range of tiny drill bits can be costly (especially as they're really easy to snap). The best solution is a mini reamer.

